

Mealy Bugs

By Maddy Hogan
In our final post for the pest series, we are diving deep into the world of mealy bugs, those plant pests that can wreak havoc on your precious greens. In this blog, we'll explore how to detect, treat, and prevent mealy bug infestations the Riza Plants way, as well as the plants they are most commonly attracted to.
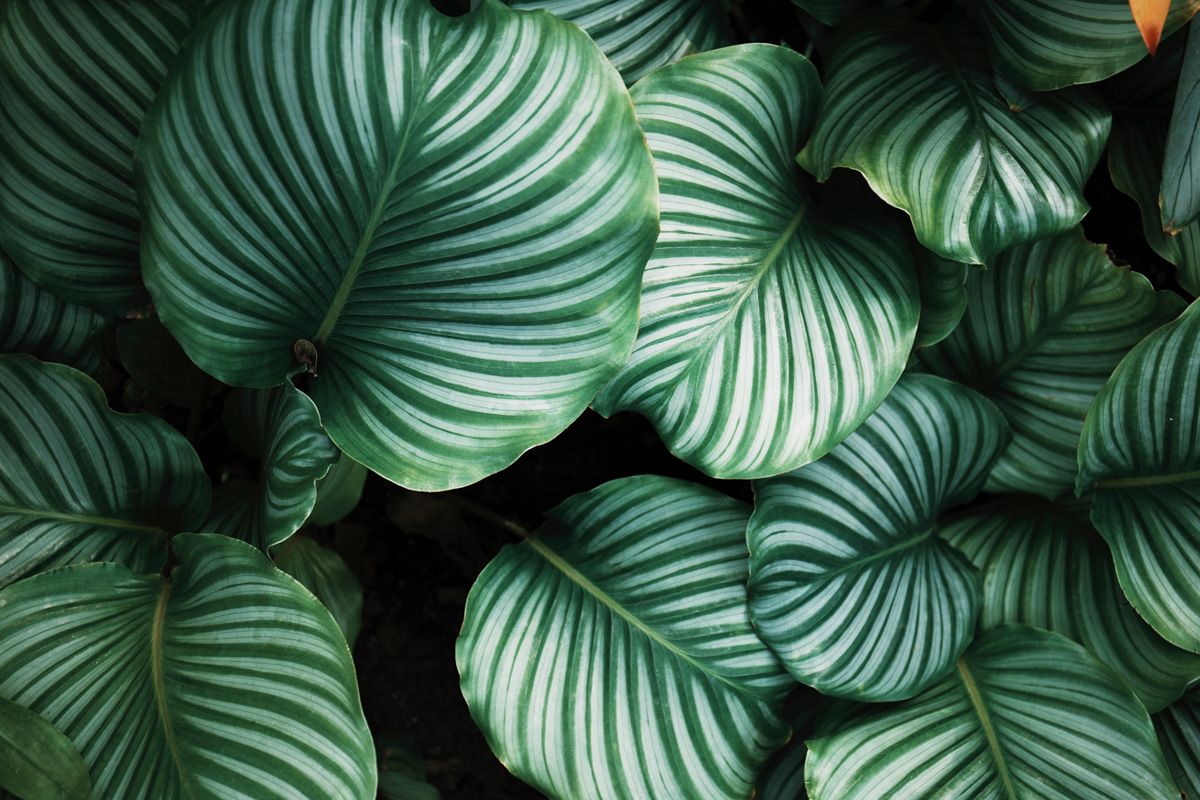
Mealy bugs are tiny, soft-bodied insects that feed on plant sap. These unwelcome visitors can be quite discreet in their initial stages, making it essential to keep a watchful eye on your plants. Below you can find a list of how to detect and identify mealy bugs on your indoor tropical house plants:
- Inspect the Plant Surface: Regularly examine the leaves, stems, and the junctions where they meet. Mealy bugs are often found on the undersides of leaves or in the crevices of a plant, appearing as small, white, cottony masses.
- Sticky Residue: Mealy bugs excrete a sticky, sugary substance known as honeydew. If you notice a sticky residue on your plant's leaves or nearby surfaces, it could be a sign of an infestation.
- Yellowing and Weakening: Infested plants may exhibit yellowing leaves, stunted growth, and an overall weakening of their health. If you see these symptoms, it's time to investigate further.
- Ant Activity: Mealy bugs can attract ants due to their honeydew secretion. If you observe ants on or around your plant, it's a clue that mealy bugs may be present.
Once you've identified a mealy bug infestation, it's crucial to take action promptly to save your plant. Here are some effective methods to treat mealy bugs and we carry the treatment sprays and snips to ensure your plants are successfully treats:
- Isolation: Isolate the infested plant from your other plants to prevent the infestation from spreading.
- Insecticidal Soap: Spray your plant with a solution of insecticidal soap, which suffocates the mealy bugs.
- Neem Oil: Neem oil is a natural and effective way to combat mealy bugs. Dilute it with water and apply it to your plant, paying attention to the undersides of the leaves.
- Predatory Insects: Introduce natural predators like ladybugs or lacewings to your indoor garden. They can help keep mealy bug populations in check.
- Pruning: If the infestation is severe, consider pruning and discarding heavily affected parts of the plant to prevent the bugs from spreading.
Mealy bugs are notorious for their adaptability, and they can infest a wide range of plants. However, some plants are more susceptible to mealy bug infestations. Commonly affected plants include:
- Succulents: Mealy bugs love succulents due to their fleshy leaves and stems.
- Orchids: The crevices and folds of orchid flowers make them an attractive target.
- Ficus Trees: Ficus species are known to be mealy bug magnets.
- Spider Plants: The long, arching leaves of spider plants are susceptible to infestations.
- Poinsettias: These popular holiday plants can fall prey to mealy bugs.
Preventative measures such as maintaining good plant hygiene, regular inspection, and isolating new plants for a quarantine period can help minimize the risk of mealy bug infestations.
At Riza Plants, we're committed to helping you keep your plants thriving and pest-free. If you ever encounter mealy bugs or have questions about plant care, don't hesitate to reach out. Together, we can ensure your green oasis remains healthy, vibrant, and pest-free.

Preparing Your Plants for Cooler Weather

By Maddy Hogan
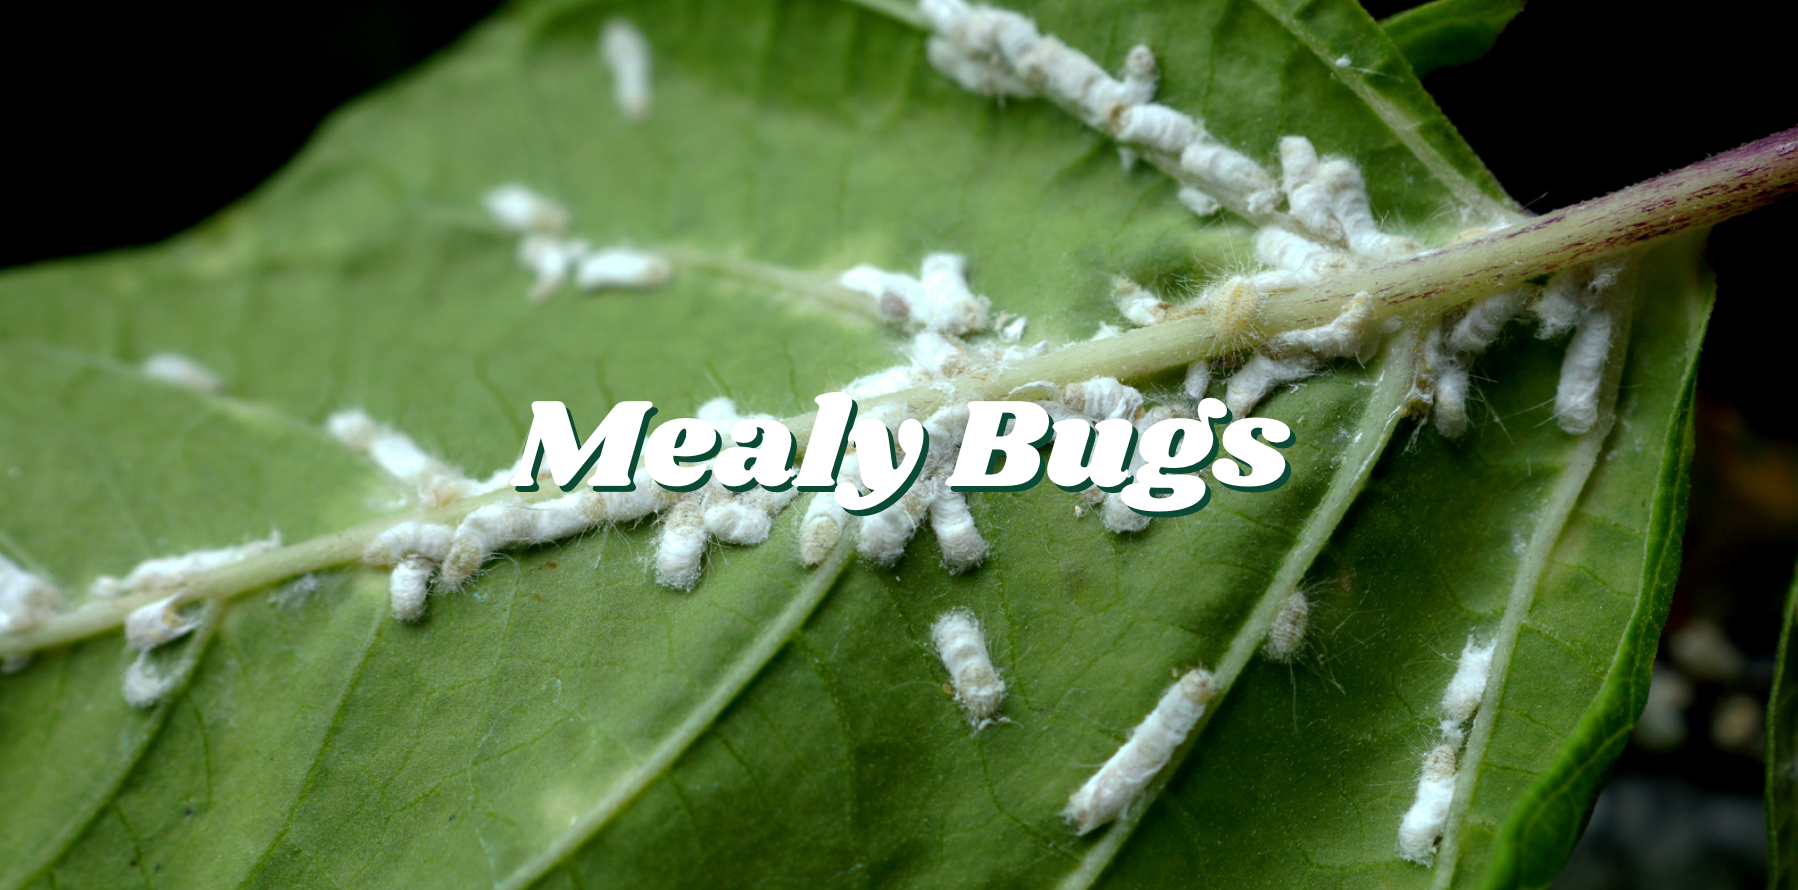
As the warm, sun-filled days of summer fade into the cooler months of autumn and winter, it's crucial to turn your attention to the well-being of your indoor tropical houseplants. These lush and vibrant companions bring life and beauty to your home year-round, but they may need some special care as the seasons change. In this blog, we'll guide you through the essential steps Riza recommends you take to ensure your tropical houseplants thrive during the cooler months.
Assess Your Indoor Tropical Plants
Before diving into preparations, take a close look at your indoor tropical houseplants. Check for signs of stress (reference last month’s blog on what to do if your plant is showing symptoms of stress), such as yellowing leaves, wilting, or pest infestations. Identifying any issues early on will allow you to address them before the colder weather sets in.
Clean and Inspect
Thoroughly clean the leaves of your plants to remove dust and debris. This not only improves their appearance, but also helps them breathe better. Take this opportunity to inspect the plants for any signs of pests or diseases. Isolate any affected plants to prevent the issue from spreading.
Adjust Watering Routine
Indoor houseplants often require less water during the cooler months due to reduced light and lower temperatures. Be mindful not to overwater and allow the top few inches of soil to dry out between waterings. Always use room-temperature water to avoid shocking the plants with cold water. During cooler months with less daylight hours and weaker sun rays, we recommend moving your plants closer to windows to absorb as much natural light as they can. The changes in light will also impact how long it takes your indoor houseplants soil to dry out, so be sure to always inspect before watering.
Monitor Humidity
Maintaining proper humidity is crucial for tropical houseplants, especially when indoor heating systems can dry out the air. Increase humidity around your plants by misting them regularly, placing a tray of water with pebbles nearby, or using a humidifier. Avoid placing your plants near drafty windows and doors, fireplaces, or furnace vents as these can impact the humidity and temperature control of the plant and soil moisture.
Reduce Fertilizing
During the cooler months, indoor tropical plants typically experience slower growth. At Riza we recommend pulling back on fertilization until the spring when they resume active growth. Over-fertilizing during this period can harm the plants, unless your plant is recently repotted or is showing signs of distress and needing some TLC, then we would recommend light fertilizing to ensure your plants are getting just what they need during the transition.
Temperature Considerations
Most indoor tropical houseplants thrive in temperatures between 65°F and 75°F. As previously mentioned, avoid placing them near drafts or heating vents, as extreme temperature fluctuations can stress the plants. If necessary, provide a gentle heat source to maintain a stable temperature.
Pruning and Grooming
Trim back any leggy or overgrown growth to maintain the plant's shape and encourage new, bushy growth. Removing dead or yellowing leaves also helps the plant focus its energy on healthy growth.
Pest Prevention
Keep a close eye on your indoor houseplants for signs of pests like spider mites, mealybugs, or aphids. Regularly inspect and treat any infestations promptly with appropriate natural or chemical remedies.
By following these steps, you can ensure your indoor tropical houseplants remain healthy and vibrant throughout the cooler months. With a little extra care and attention, your lush green companions will continue to thrive and brighten your home, even when the weather outside is chilly. So, embrace the changing seasons and take the time to care for your indoor tropical treasures as they provide beauty and tranquility all year round.


What Not to Do When a Plant is Showing Signs of Distress

By Maddy Hogan
As plant enthusiasts, we all want our indoor tropical houseplants to thrive and flourish. However, sometimes, despite our best intentions, our leafy friends can exhibit signs of distress. It's essential to remember that while it's natural to want to help, there are certain things you should avoid doing when your indoor tropical houseplant isn't at its best. We'll discuss some common mistakes people make and how to avoid them, using Riza Plants methodology as our guide.
No Repotting
One of the first instincts many plant owners have when they notice their indoor tropical houseplant isn't doing well is to consider repotting it. While repotting can be beneficial when done at the right time, it can also cause more harm than good if performed when unnecessary.
Why you should avoid repotting too soon:
- Stress - Repotting is a stressful experience for plants. It disrupts their root system, and during times of distress, this can exacerbate the problem.
- Over-potting - Putting a struggling plant into a larger pot can lead to overwatering and root rot. It's better to repot only when the plant has outgrown its current container.
- Misdiagnosis - The underlying issue may not be related to the pot size. It could be related to a watering, light, or pest problem.
Instead, focus on identifying the actual cause of the distress, such as watering issues or inadequate light, and address that before considering repotting.
No Watering Without Checking Soil
Another common mistake is the tendency to water houseplants when we notice their leaves drooping or browning. However, it's crucial not to water blindly without checking the soil moisture.
- Overwatering - Overwatering is a leading cause of indoor plant distress. When you water without assessing the soil, you risk making the situation worse by drowning the roots.
- Root Rot - Soggy soil can lead to root rot, which is often fatal for plants.
- Poor Drainage - If the pot lacks proper drainage, water may accumulate at the bottom, causing root problems which will lead to distress.
At Riza Plants, we carry moisture meters which are super helpful to determine the moisture level of your soil. If you are concerned about your plant and you don’t have a moisture meter handy, insert your finger at least an inch into the soil; if it feels dry, it's time to water. If it's still moist, hold off on watering until the soil dries out a bit more.
No Moving the Plant Around
Sometimes, we think that relocating our houseplants to different spots in our homes will help them thrive. However, constantly moving a distressed plant can do more harm than good.
Why you should avoid moving the plant around:
- Stress - Frequent relocation disrupts a plant's acclimation to its environment, causing stress.
- Inconsistent Lighting - Different spots in your home may offer varying levels of light, and moving the plant around can disrupt its access to consistent light, which is crucial for its health.
- Adjusting to New Conditions - Every time you move a plant, it needs time to adapt to the new environment which can take up to 2 weeks, diverting energy away from recovery.
Instead, find a suitable, well-lit spot for your tropical houseplant and leave it there. Ensure it receives the appropriate amount of sunlight and maintain a stable environment to help it recover.
When your indoor tropical houseplant shows signs of distress, it's essential to resist the urge to repot, water without checking the soil, or move it around frequently. Instead, take a patient and methodical approach to identify the root cause of the problem and address it accordingly. By avoiding these common mistakes and providing your plant with the care it truly needs, you can increase the chances of seeing your beloved green companion return to its vibrant and healthy state. Remember, the experts at Riza Plants in downtown Napa are always there to provide guidance and beautiful botanical solutions for your indoor plant needs.


Itsy Bitsy Spider Mites

By Maddy Hogan
You will often hear us say, ‘bring the outside in’ at Riza when we are discussing all the wonderful options of houseplants we carry, but sometimes that means bringing more than just the plant. As any plant parent knows, maintaining healthy indoor plants requires vigilance and care. One of the most common challenges plant enthusiasts face is the infestation of spider mites. These tiny pests can wreak havoc on your beloved green companions if not identified and treated promptly.
In this blog post, we'll explore what spider mites are, how to detect their presence, effective treatment and preventative care methods, and when it might be time to admit defeat and say goodbye to your battle-worn plants.
What are Spider Mites
Spider mites are minuscule arachnids that are known for their ability to reproduce rapidly, making them a huge annoyance for indoor gardeners. They thrive in warm and dry conditions, making indoor environments with low humidity particularly conducive to their growth. Spider mites pierce plant cells and feed on the sap, causing visible damage such as stippled and yellowing leaves, and even webbing in severe cases where reproduction has gone undetected for too long.
Detecting Spider Mites
Early detection is crucial in the battle against spider mites. Look out for the following signs to determine if your plants are suffering from a spider mite infestation:
Treatment
Taking swift action is essential to control spider mites and save your plants. Here's how to combat these pests effectively:
Preventative Care
An ounce of prevention is worth a pound of cure when it comes to spider mites. Follow these practices to minimize the risk of infestation:
Knowing When to Surrender
Despite your best efforts, there might come a point when the battle against spider mites seems insurmountable. Signs that you might be losing the battle include widespread plant damage, continued decline despite treatment, and the infestation spreading to multiple plants. In these cases, it's important to consider the health of your other plants and make a tough decision about whether to salvage what you can or part ways with the infested plant to protect the overall well-being of your indoor garden.
Dealing with spider mites can be a challenging task, but with vigilance, prompt action, and a solid preventative strategy, you can significantly reduce the risk of infestation and keep your indoor plants thriving. Regular monitoring, quick treatment, and creating an inhospitable environment for these pesky pests will go a long way in maintaining a vibrant and healthy indoor garden. Remember, every plant parent faces setbacks, but each experience is an opportunity to learn and refine your gardening skills.
REMINDER: At Riza, we are always happy to answer your plant related questions when it comes to pest identification and treatment, however we appreciate you not bringing any plants you suspect have disease or pests into our downtown Napa location. Please take a photo and show us in-person or email us at hello@rizaplants.com.


Dirt Free, Way to Be: Air Plant Care

By Maddy Hogan
To continue with this month’s theme of exquisite plants that have some neat features that are sure to impress, Riza Plants brings you air plants. These captivating and low-maintenance additions to your plant collection will spare you the mess that often comes with soil and have so many varieties, colors, shapes, and even blooms, you’ll be hard pressed to find an airplant that doesn’t speak to your home or office environment.
One of the most intriguing characteristics of airplants is their name itself, they do not require soil to survive, in fact they will NOT survive if you plant them in. Airplants obtain all the nutrients and moisture needed for their survival through their specialized trichomes, small scales covering their leaves that resemble peach fuzz. There are two methods that we recommend following to water your airplants. Once a week, submerge your airplant upside down in a bowl of room-temperature water for 15 minutes. After the submersion, make sure you lay the airplant upside down to dry for at least 2 hours and allow all water flow out from the crevices in the leaves. The second method is to spritz your airplant with a mister at least 2 times a week. We have these amazing gold misters available in-store for purchase and they are perfect for your weekly airplant mistings.
To mimic their natural habitat in tropical regions, airplants prefer bright, indirect light. A windowsill with filtered sunlight or an area near a lamp would be ideal. Avoid placing them in direct sunlight, especially during the scorching afternoon hours, as airplants have sensitive leaves and this could lead to sunburn.
As for the environment, airplants are adaptable, but generally prefer a warm and humid setting. They thrive in humidity levels between 50-60%, which can be achieved by placing a tray of water nearby or using a humidifier. Air circulation is also crucial, so ensure they have adequate airflow by avoiding enclosed spaces and allowing them to dry out completely in between mistings or submersions.
Aside from living without soil, airplants have characteristics that differ from many other indoor houseplants. Airplants are epiphytes, meaning they attach themselves to other surfaces, such as trees or rocks, but airplants do not draw nutrients from the surfaces that they attach themselves to. Instead, they merely use these structures as a platform to grow and don't harm the host. Additionally, airplants have the ability to absorb and filter toxins from the air, contributing to improved indoor air quality. Airplants are also pet friendly and pose no significant toxicity threat to your furry friends. That said, depending on the breed and size of your pet, it is always recommended to keep plants safely out of reach of pets to avoid any accidents.
Airplants reproduce through the formation of offsets, commonly known as "pups." These baby plants emerge at the base of the parent plant and can be left to grow into new individuals. Once the pups have grown to about one-third the size of the parent, they can be carefully removed and will continue to grow separately as it’s own airplant that will eventually reproduce with a clone of the parent as well.
In addition to the reproduction of airplants via pups, airplants also have a blooming process that is truly magical. During their bloom cycle, which can last from a few days to several months, the plant produces a flower spike from the center. The spike bursts open, revealing a captivating and colorful flower. After the bloom, the plant may produce seeds, which can be collected and propagated to grow more airplants. It is important to note that when your airplant is actively blooming, you want to avoid submerging the bloom in a bowl of water and instead mist the airplant more frequently with your mister or spray bottle.
We carry so many different sizes, shapes, colors, and blooming varieties of airplants in our Downtown Napa location at 1300 1st Street, Suite 355. Pop in and pick out an airplant, a fun mister, and maybe even one of our handmade airplant holders from local artisan Muds Ceramics.


Delving into the Fascinating World of Carnivorous Plants

By Maddy Hogan
Carnivorous plants diverge from the ordinary because they demand specialized care and attention. Understanding their uniqueness, preferred environments, water and sunlight needs, and the concept of "feeding" is vital to help these extraordinary plants thrive and flourish in your home environment, as opposed to where they occur naturally in nature.
Carnivorous plants are nature's skilled hunters, adapted to capture and digest insects and other small organisms to supplement their nutrient-poor habitats. This captivating adaptation to supplement their diet with extra nutrients sets them apart from other plants. The key feature of carnivorous plants is their modified leaves that serve as traps, attracting and entrapping prey through various mechanisms, such as sticky substances, pitfall traps, or snapping jaws.
Pitcher Plants (Nepenthes)
Pitcher plants are the mesmerizing architects of death traps. Their elongated, tubular leaves form a pitcher-like structure that lures insects inside with nectar and vibrant colors. Once within, downward-pointing hairs and slippery surfaces prevent escape. The prey drowns in the pitcher's digestive fluids, and the plant absorbs the nutrients, allowing it to thrive in nutrient-poor soil.
Pitcher plants flourish in tropical and subtropical regions with high humidity and warm temperatures. They prefer acidic and well-draining soil, commonly found in boggy or swampy areas.
These plants require consistently moist soil to mimic their natural boggy environment. Avoid water logging, as this can cause root rot. Partial shade with some filtered sunlight is ideal; direct sunlight can scorch the leaves.
Though pitcher plants obtain some nutrients from the soil, they rely on insects and other small organisms for supplementary nourishment. In captivity, you can occasionally offer them small live insects, such as flies or ants, to maintain their health.
Sundews (Drosera)
Sundews are a captivating group of carnivorous plants known for their alluring, sticky, and dew-covered tentacles. Insects are drawn to the glistening droplets, mistaking them for nectar. Once an insect makes contact, the tentacles curl around the prey, releasing digestive enzymes to extract vital nutrients.
Sundews prefer a diverse range of habitats, from temperate regions to tropical rainforests, thriving in nutrient-poor soils like bogs, marshes, and sandy areas.
Keep the soil consistently moist with distilled or rainwater, as tap water may contain minerals harmful to these plants. They require bright, indirect sunlight or partial shade, but avoid exposing them to scorching midday sun.
Sundews are excellent self-sustainers. While they primarily rely on insects, they do not require frequent feeding. They will capture their prey naturally, and you can leave them to their hunting prowess.
Venus Flytrap (Dionaea muscipula)
One of the most famous carnivorous plants, the Venus Flytrap, boasts hinged, trap-like leaves with sensitive trigger hairs. When an unsuspecting insect touches the hairs twice, the trap snaps shut in a fraction of a second, entrapping its prey.
Venus Flytraps thrive in humid, boggy environments with nutrient-poor, acidic soils. They are native to parts of the southeastern United States.
Keep the soil consistently moist but not waterlogged. As for sunlight, these plants adore bright, direct sunlight. A south-facing windowsill or outdoor spot with plenty of sunlight is ideal.
Venus Flytraps are active hunters and require a diet of insects to thrive. In their natural habitat, they catch their prey regularly. However, if kept indoors, you can supplement their diet with live insects like flies, ants, or small spiders, but avoid overfeeding to prevent stress on the plant.
Caring for carnivorous plants requires a deep understanding of their unique characteristics and preferences. As you venture into this extraordinary world of pitcher plants, sundews, and Venus flytraps, remember to recreate their natural habitats to ensure their longevity and vibrancy. By providing the right environment, water, sunlight, and occasional feeding, you can witness these remarkable plants in all their predatory glory, making your home or garden a living testament to nature's captivating wonders. We have various sizes of all three of these wondrous carnivorous beauties available at our Downtown Napa location at 1300 1st Street, Suite 355. Come by and we are happy to help you find the perfect one to take home with you!


Fertilizer: What to Use & When to Use It

By Maddy Hogan
Indoor plants bring life, beauty, and a touch of nature into our homes. To ensure that our leafy companions thrive and flourish, providing them with proper nutrition is essential. Indoor plant fertilizers play a crucial role in supplying the necessary nutrients for healthy growth and vibrant foliage. In this blog post, we'll explore different types of fertilizers, discuss important chemical components, highlight the benefits of seaweed fertilizer, delve into Espoma's specialized fertilizers for cactus, orchids, African violets, and other indoor plants, and address safety concerns regarding the use of indoor plant fertilizers around pets and children.
When choosing a fertilizer for your indoor plants, it's important to consider the specific needs of each plant species. Fertilizers provide essential nutrients, including nitrogen (N), phosphorus (P), and potassium (K), often referred to as N-P-K ratios. Different plants require varying levels of these nutrients, so it is important to select a fertilizer with the appropriate NPK ratios to meet your indoor plant's specific requirements.
-
All-Purpose Fertilizers: are suitable for most indoor plants and provide a balanced ratio of nitrogen, phosphorus, and potassium. Look for a well-rounded option with a ratio like 10-10-10 or 20-20-20. These ratios ensure that your plants receive a sufficient supply of all three major nutrients for healthy development.
-
Organic Fertilizers: if you are seeking a more sustainable and environmentally friendly option, organic fertilizers are an excellent choice. Derived from natural sources such as compost, manure, or plant matter, organic fertilizers release nutrients slowly over time. Organic fertilizers also enhance soil fertility, improve soil structure, and promote beneficial microbial activity, contributing to overall plant health.
- Liquid Fertilizers: typically come in concentrated form and are mixed with water for easy application with regular watering. They are quickly absorbed by plants, allowing for faster nutrient uptake. Liquid fertilizers are available in various formulations, including balanced N-P-K ratios or specialized formulas tailored for specific plant types. They provide a convenient and effective way to feed indoor plants.
Apart from the N-P-K ratios, it's essential to understand the chemical components and percentages of fertilizers to make informed choices for your indoor plants. Besides nitrogen, phosphorus, and potassium, secondary macronutrients such as calcium, magnesium, and sulfur, as well as micronutrients like iron, manganese, zinc, and copper, are vital for plant growth. Some fertilizers may also contain additional beneficial additives, such as seaweed extracts or beneficial microbes, which enhance plant health and resilience.
One of Riza’s Favorites: The Benefits of Seaweed Fertilizer

Seaweed fertilizer has gained popularity among indoor plant enthusiasts for its numerous benefits. Seaweed contains essential growth hormones, trace minerals, and amino acids that promote plant vigor, root development, and stress resistance. It also improves soil structure and encourages microbial activity. Seaweed fertilizer can be used as a foliar spray or incorporated into the soil, providing a natural and effective boost to your indoor plants' health.
We carry Growmore Seaweed Extract fertilizer in our Downtown Napa storefront and regularly water our shop plants with this fertilizer for an added boost. This fertilizer is especially good for those more fickle plants, such as the Fiddle Leaf Fig.
Espoma, a renowned name in organic plant care, offers a range of specialized fertilizers designed for specific indoor plants, ensuring optimal nutrition and growth. Let's explore their specific products.

Espoma Cactus Mix
- This specialized fertilizer is formulated with a balanced N-P-K ratio, as well as additional ingredients like bone meal and humates, to meet the unique needs of cacti and succulents. It provides the right combination of nutrients to support these plants' water-retaining capabilities, promote healthy root development, and enhance overall resilience.
Espoma Orchid Bloom Booster
- Orchids have specific nutritional requirements, and Espoma's Orchid-tone caters to these needs. Enriched with organic ingredients, including feather meal, bone meal, and mined potassium sulfate, this fertilizer supplies the essential nutrients orchids needed for robust foliage, vibrant blooms, and overall vitality.
Espoma African Violet Mix
- African violets are beloved indoor plants known for their stunning flowers. Espoma's African Violet Mix is specially formulated to deliver the necessary nutrients for vibrant blooms and healthy foliage. This fertilizer contains a balanced N-P-K ratio, along with ingredients like sphagnum peat moss and perlite to ensure optimal moisture retention and aeration.
Pet and Child Safety with Indoor Plant Fertilizers
While indoor plant fertilizers are essential for the health and growth of our beloved plants, it's important to consider the safety aspects, particularly when it comes to pets and children. Here are some key points to keep in mind to ensure a safe environment:
- Read the Label: Before purchasing any indoor plant fertilizer, carefully read the product label and packaging. Look for any warnings or cautions regarding toxicity or potential hazards. Choose fertilizers that are labeled as safe for use around pets and children.
- Store Fertilizers Securely: Store fertilizers in a safe place that is inaccessible to pets and children. Consider using locked cabinets or high shelves to prevent accidental ingestion or exposure.
- Follow Application Guidelines: When applying fertilizers, follow the recommended dosage and application instructions provided by the manufacturer. Avoid over-fertilization, as this can lead to nutrient imbalances and potential harm to plants and surrounding living beings.
- Keep Pets and Children Away During Application: During fertilizer application, it's best to keep pets and children away from the area until the product has been properly absorbed or washed into the soil. This minimizes the risk of accidental contact or ingestion.
- Watering and Drainage: After applying fertilizer, ensure thorough watering to help the nutrients penetrate the soil and prevent any residue on the plant's surface. Adequate drainage is crucial to prevent standing water, which could attract pets or children.
- Natural and Organic Alternatives: Consider using natural and organic fertilizers, as they tend to have fewer chemical additives and are often safer for pets and children. Examples include compost tea, worm castings, or seaweed-based fertilizers.
- Pet and Child Behavior: Monitor the behavior of your pets and children around indoor plants. Some pets may be attracted to the smell or taste of certain fertilizers, while curious children may be inclined to explore and touch plants. Keep an eye on their interactions to prevent any accidental ingestion or contact.
- Pet-Safe and Child-Friendly Plants: Another precautionary measure is to choose indoor plants that are known to be safe for pets and children. This reduces the risk of accidental exposure to potentially harmful substances, including fertilizers. Consult reputable sources or your veterinarian for a list of pet-safe plants.
Proper timing and frequency of fertilizer application are crucial for maximizing the benefits and minimizing the risks associated with fertilizing indoor house plants. Here are some guidelines to help you determine the best time to fertilize and the ideal practices to follow:
- General Timing: Indoor plants generally require fertilization during their active growth periods, which typically occur in the spring and summer months, we recommend April - October. This is when plants exhibit increased energy and nutrient demands due to enhanced photosynthesis and growth. As a general rule, refrain from fertilizing during the dormant period, which usually takes place in fall and winter.
- Follow Plant-Specific Recommendations: While the spring and summer months serve as a general guideline, it's important to refer to plant-specific recommendations. Different plant species have unique growth patterns and nutrient requirements. Some plants may benefit from year-round fertilization, while others may require a dormant period without fertilization. Research your specific plant species or consult with a horticulturist or plant expert to determine the best fertilizing schedule for your indoor plants.
- Dilute Strength and Frequency: When fertilizing indoor plants, it's crucial to follow the manufacturer's recommended dosage and frequency. It's generally safer to use a slightly lower concentration than the maximum recommended strength to avoid the risk of over-fertilization. Remember, more is not always better when it comes to fertilizers. Applying fertilizer at regular intervals, such as every two to four weeks, is usually sufficient for most indoor plants during their active growth phases.
- Watering Routine: It's advisable to water your indoor plants thoroughly before applying fertilizer. This ensures that the roots are well-hydrated and helps prevent the concentration of nutrients around the roots, reducing the risk of burning or damaging the plant's delicate root system.
- Time of Day: While there isn't a specific time of day that is significantly better for fertilizing plants, it's generally recommended to fertilize in the morning or early afternoon. This allows the plants to utilize the nutrients throughout the day as they photosynthesize and grow. Avoid fertilizing in the evening or before nighttime to prevent excess moisture on the leaves, which could potentially lead to fungal issues.
- Adjusting Fertilization During Plant Stress: If your indoor plants are experiencing stress, such as due to transplanting, illness, or extreme temperature fluctuations, it's best to hold off on fertilization until they have recovered. Fertilizers can add additional stress to already weakened plants, so it's important to prioritize their overall health and recovery.
Nurturing your indoor plants with the right fertilizers is a key component of their overall health and vitality. Understanding the different types of fertilizers, their chemical components, and percentages empowers you to make informed choices for your indoor plants' specific needs. Whether you opt for all-purpose fertilizers, organic alternatives, or specialized formulations like Espoma's products, regular and appropriate fertilization will contribute to the beauty and vibrancy of your indoor plant collection. Moreover, by taking the necessary precautions and following safety guidelines, you can ensure the well-being of your pets and children. Embrace the joy of tending to your indoor plants with the knowledge and confidence that they are receiving the nutrients they need to thrive. All specific fertilizers mentioned in this blog can be purchased in our downtown Napa location at 1300 1st Street, Suite 355.


The Plant Acclimation Period

By Maddy Hogan
Regardless if you are a first-time plant parent, or a seasoned green thumb, bringing a new plant home from the store comes with the responsibility of providing proper care, such as sunlight and water, but also the responsibility of allowing your plant to appropriately acclimate to its new environment. For indoor houseplants, we refer to this as the acclimation period and educate all our customers at Riza Plants that this period can take up to two (2) weeks once you bring your new plant home. Similar to us humans or pets when we are placed in a new environment, ‘repotted’ or moved homes, or the weather and lighting conditions change, we all require acclimation periods, and so go our little house plants. We are here to help get you through the acclimation period for your indoor plants, spot the warning signs, and also diagnose if something more serious is happening.
Where to Focus When Bringing a New Plant Home
Light: Observe the light conditions in your home and try to match them with the plant's requirements. Gradually introduce the new plant to its designated spot, allowing it to adjust to the intensity and duration of light. Avoid direct sunlight during this initial period to prevent stress or sunburn.
Temperature and Humidity: Plants, like humans, thrive within a specific temperature range. Before bringing a new plant home, ensure that your living space provides the right temperature and humidity levels. Avoid placing your plant near drafts, heaters, or air conditioning units, which can cause fluctuations and discomfort.
Watering: Get acquainted with your plant's watering needs, as different species have varied moisture requirements. Upon arrival, inspect the soil moisture level and adjust accordingly, making sure not to overwater. Gradually establish a watering routine, allowing the plant to adapt to its new watering schedule.
How to Tend to Your Plant After Repotting
Repotting is a fantastic opportunity to invigorate your plants, providing them with fresh soil, increased space, and improved drainage. To ensure a successful acclimation, follow these guidelines:
Timing: Choose the right time to repot your plant, ideally during the active growing season when the roots are most vigorous. Avoid repotting during the colder months or when the plant is flowering or in the midst of a growth spurt.
Preparation: Select an appropriate pot size that allows for future growth while avoiding excessive space. Choose a well-draining potting mix suitable for your plant's specific needs. Soak the potting mix before repotting to facilitate water absorption.
Transition: Gently remove the plant from its old container, being mindful of the roots. Carefully prune any damaged or overcrowded roots before placing the plant in its new home. After repotting, avoid direct sunlight and reduce watering temporarily to prevent overhydration during the acclimation period.
Moving a Plant to a New Environment or Location
Sometimes, relocating a plant within your home becomes necessary, whether for aesthetic reasons or to improve its growing conditions. Make the transition smooth with these steps:
Gradual Relocation: When moving a plant to a new environment or location, avoid sudden shifts. Begin by placing the plant in its desired spot for a few hours each day, gradually increasing the duration over a week or two. This helps the plant adapt to the new light conditions and temperature fluctuations.
Temperature and Humidity Changes: Monitor temperature and humidity levels in the new location to ensure they align with the plant's requirements. If necessary, use a humidifier or pebble tray to maintain optimal humidity. Remember, sudden changes in these factors can shock your plant, so be mindful and make adjustments gradually.
Vigilant Care: During the relocation process, closely monitor your plant's response to the new environment. Watch for signs of stress, such as wilting or yellowing leaves, and adjust your care regimen accordingly. Maintain consistency in watering, fertilizing, and any other specific care routines.
While these tips and tricks cover a majority of what your indoor houseplants may experience during the acclimation period, it definitely is not fully comprehensive. Our team at Riza is always happy to educate you on your new plants that you are purchasing in-store and will send you home with a care card that describes the regular lighting and watering requirements. If you are repotting or moving your plants, we can also recommend any packing tips, how to best approach the acclimation period based on type of plant, and warn you about what signs of distress would look like if your indoor houseplant is not responding to change well. Overall, plants are living species and are built for change and acclimation. With the proper overall care and preparation, you should have success in re-homing or moving your plants around!


I’m Moving - How to Prepare My Plants!

By Maddy Hogan
Moving to a new home can be an exciting adventure, but it can also be a stressful time for our beloved indoor house plants. To ensure their safe transition, it's crucial to take the necessary steps to prepare and care for them throughout the moving process. In this blog post, we will guide you through best practices on how to water, store, and wrap your plants, as well as how to care for them once they have settled into their new space.
Assessing Your Plants
Before the move, take the time to evaluate the needs and characteristics of each plant. Some may require special care due to their size, fragility, or specific environmental conditions. Understanding your plants' requirements will help you plan their relocation effectively.
Watering
About a week before the move, water your plants thoroughly, ensuring the soil is evenly moist. Avoid overwatering, as it can make the pots heavy and increase the risk of root rot during transit. However, it's essential to maintain adequate moisture levels to prevent dehydration.
Pruning, Preparing, & Cleaning
Trim any dead or damaged leaves and check your plant for pests prior to transit. Cleaning the leaves with a damp cloth will help them breathe better and reduce the chances of pests hitching a ride to your new home.
How to Choose Suitable Packaging
For small-sized plants, carefully wrap each pot in several layers of newspaper or bubble wrap. Secure it with tape to protect the plant and prevent soil spillage. Alternatively, you can use plant sleeves or plastic bags with air holes for a secure fit.
We recommend using a large tote or bag that has a sturdy and well-supported base with an open top to allow the plant to continue breathing during packing and transit. The open top of the tote or the bag should be sturdy on its own so that it does not collapse in on any delicate foliage of the plant inside.
For larger plants, we recommend bagging the pot in a heavy duty trash bag and securing the top above the soil line with packaging tape. This will keep any loose soil from spilling anywhere other than inside the trash bag during transport. Additionally, we recommend padding any delicate foliage or trunks of your indoor house plants with bubble wrap prior to transporting.
Packing & Transporting
For small plants, place them in a sturdy box with packing material to prevent shifting during transportation. Fill any empty spaces with crumpled newspaper or bubble wrap to provide additional cushioning.
Large plants should be moved separately, ideally in a moving van or truck. Secure them by placing non-slip mats or old towels around the pots to prevent movement. Avoid stacking heavy objects on top of them to prevent damage.
Unpacking & Reacclimatizing
Once you arrive at your destination, unpack your plants as soon as possible. Remove the packaging carefully, avoiding any damage to the foliage, or roots.
Finding the Right Spot
Reintroduce your plants to their new environment gradually by placing them in an area with similar lighting conditions to their previous location and those conditions which mimic their natural environment. You should carefully observe how your indoor houseplants respond and make adjustments, if necessary, remembering that each time you move your indoor houseplants that the acclimation period of 2-3 weeks resets. We always recommend avoiding placing indoor houseplants near drafty windows, heating vents, or air conditioning units as these can cause damage or shock.
Watering and Settling-In
Allow your plants to acclimate to their new surroundings before watering them. Check the moisture level of the soil by inserting your finger at least an inch deep or use one of our Classy Casita Moisture Meters that we sell in store and online. When the top 1-2 inches of soil is dry to the touch, you can resume the regular watering schedule for your indoor houseplants. Be careful not to overwater your plants after the move as the root systems may be more delicate and fragile, therefore more prone to shock or root rot.
Patience & Ongoing Monitoring
During the first two weeks, closely monitor your plants for signs of stress or any changes in growth. Be patient as they adjust to their new environment. You can resume regular care routines, such as fertilizing and pruning, once they have settled in, but refrain from moving your houseplants around too frequently once your move is complete. Once you find a suitable place with the proper lighting for your houseplants, leave it there to acclimate and reduce any shock. Remember that all plants take 2-3 weeks to acclimate to a new environment, similar to humans and pets, so patience is key to ensuring your indoor plants thrive.
Moving to a new home does not have to be a daunting experience for your indoor house plants. With the proper preparation, care, and attention, you can ensure their smooth transition and continued well-being in their new home. If you have any questions or need assistance with transporting or repotting of plants, contact our downtown Napa store at (707) 637-4388 or email us at hello@rizaplants.com!


Vacation Plans? How to Prep Your Plant

By Maddy Hogan
Summer is nearly here and we are all excited to be out in the sunshine, reconnecting with friends and family, and taking a hard-earned vacation. While taking a vacation is an exciting prospect, it can leave you wondering about the well-being of your beloved indoor houseplants. Sound familiar? Don’t fret, the Riza team is here to assist with some guidance on how to prep your plant friends while you jet-set to a new and exciting destination!
Assess Your Plants' Needs
Before embarking on your vacation preparations, it's crucial to understand the specific needs of your indoor plants. Consider factors such as light requirements, watering schedules, and humidity preferences for each plant. This will help you tailor your preparation methods accordingly.
Adjust Watering Schedule
Proper watering is vital for the health of your plants, and this becomes even more critical when you're away. Adjust your watering schedule to ensure your plants are neither overwatered nor dehydrated. Water your plants a day or two before leaving to give them a good soak, but avoid waterlogging. If possible, place plants with similar water requirements together, making it easier to water them collectively or use self-watering devices to maintain moisture levels. Checking the moisture level of the soil with a moisture meter prior to watering and preparing your plants for vacation is super helpful to reduce overwatering.
Create a Self-Watering System
For extended vacations, setting up a water watcher system is an excellent solution. Ensure the water supply is adequate and that the setup is securely in place. Test the system before you leave to address any potential issues.
Adjust Light Exposure
Just like water, light plays a crucial role in plant health. Before leaving, consider the light requirements of your plants. Move light-loving plants closer to windows or under artificial lights. For shade-loving plants, place them in a spot with indirect light. Be cautious of intense sunlight that could scorch delicate leaves while you are away. It is also helpful to check the local weather prior to departure so you can take into account any extended periods of overcast or cool weather, as well as extended heat waves.
Humidity Control
Maintaining optimal humidity levels is essential, especially if you live in a dry climate. Grouping plants together can create a microclimate that retains moisture. Alternatively, you can use a tray filled with water and pebbles or invest in a room humidifier to provide consistent humidity levels.
Prune and Clean
Before leaving, give your plants a little TLC. Prune away any dead or dying leaves to encourage healthy growth. Cleaning the leaves with a damp cloth or gentle spray will remove dust and allow them to photosynthesize more efficiently in your absence.
Pest Prevention
Pests can quickly wreak havoc on your plants while you're away. Inspect your plants for signs of pests and take appropriate action, such as using insecticidal soap or neem oil, before leaving. Quarantine infested plants to prevent the spread of pests to other healthy plants. If you have any questions or concerns regarding products to use or how to prep your plants to fight off pests in your absence visit us in-store in our Downtown Napa location, we are always happy to help!
Secure Plant Placement
Consider the location of your plants and ensure they are secure to avoid accidental falls or damage. Move fragile or tall plants away from high-traffic areas, and consider using plant stakes or ties to provide extra support.
Seek Plant-Sitting or Professional Help
If you're going away for an extended period or have a collection of high-maintenance plants, it might be wise to enlist the help of a plant-sitter or a professional plant care service, we offer this at Riza (check it out here)! We can provide regular watering, light adjustments, and monitor the overall health of your plants in your absence.
Vacations are a much needed part of life, especially after the wet and rainy season we had this winter. The team at Riza is here to help with the products, tools, and education so that you definitely do not have to worry about your indoor houseplant friends while you are away!


Transferring Props from Water to Soil

By Maddy Hogan
In a continuation of our earlier blog post, Propagation: What’s easiest and how to master it!, we are now discussing how to successfully transfer your rooted props to their new full-time home in a pot with soil.
Preparing for the Transition
- Before moving your plant propagations to soil, it is essential to ensure you have all the necessary materials at hand. Gather small pots or containers with good drainage, nutrient-rich potting soil, a spray bottle for watering, and a trowel or spoon for planting. Additionally, you may need a rooting hormone, we recommend Clonex mist, to encourage healthy root development.
- The new potting container you choose should be 1-2” larger than your propagations roots are long. For example, if the roots on your propagation are 4” long, we recommend choosing a pot that is 6” in diameter. This allows for the proper amount of space for the roots to establish themselves in soil, while not being overcrowded.
Timing the Transfer
- Timing is everything when transitioning propagations from water to soil. The water roots should be at least 1-2” in length at minimum for a successful transition, but if you aren’t in a hurry, 2-4” inches long is preferred for better root establishment. Transitioning roots from water to soil too early can lead to root damage as water roots are more sensitive than soil roots.
- The time it takes for a water propagation to grow roots 2-4” in length will vary by plant species. To stick with the species from our previous blog, pothos, philodendrons, and monsteras can begin rooting within 3 to 6 weeks, where pileas can quickly begin rooting within a matter of days.
Preparing the Soil
- Beginning with your potting container that is 2” larger than your propagated roots are long, fill the pot with 2” of a nutrient rich potting soil that has a good ratio of peat moss and perlite. Peat moss will assist with water retention in the soil which is important when transferring from 100% water-based propagation to soil. You will want to keep the soil consistently moist without over saturating. Perlite will assist with aeration in the soil to ensure that the moisture doesn’t create a means for harmful bacteria that can impact your new root system.
Transplant Process
- Gently remove the cutting from the water, taking care not to damage the delicate roots. If the roots have tangled, carefully untangle them to prevent breakage. Optional step to give the rooted cutting a rinse with warm water and spray with Clonex mist to encourage healthy root growth.
- Prepare a small hole in the potting soil, ensuring it's deep enough to accommodate the roots without bending or crowding them.
- Place the cutting in the pot, making sure the roots are spread out naturally.
- Fill the hole with potting soil, gently compacting it around the cutting to provide stability.
- Water the newly potted cutting thoroughly, ensuring the soil is evenly moist but not soggy. Use a spray bottle to avoid disturbing the delicate roots.
- Place the potted cutting in a warm and well-lit location, avoiding direct sunlight initially to prevent stress. Gradually introduce more sunlight over the course of a few days based on what the type of plant needs.
Post-Transplant Care
- Provide consistent care for your newly transplanted cuttings to support their adaptation to soil and growth. Keep the soil slightly moist, but not waterlogged, and avoid overwatering, which can lead to root rot. Monitor the plant for signs of stress or wilting, and adjust watering accordingly. As the plant establishes itself, introduce a regular fertilization schedule suitable for the specific plant species between the months of April - October.


Propagation: What’s easiest and how to master it!

By Maddy Hogan
Collecting indoor houseplants has morphed from a pandemic essential, into a longer term trend with enhanced benefits for your living space aesthetic as well as your personal health. From stunning foliage that features intricate designs and colors, plants have the ability to purify our air of toxins while proving to become an integral part of our home and office decor. One of the additional benefits of indoor houseplants is that they are easily propagated, creating new plants to share with friends, add more greenery to your space, or fill in an older plant that needs some TLC. Below we will be jumping into what propagation is, methods of propagation, and what houseplants are the easiest to propagate.
You may be thinking ‘what is propagation?’ Propagation is the sexual or asexual reproduction of plants. Sexual reproduction of plants through seeds is common, but not always the best results and often the plant may appear different than the parents. Asexual propagation is extremely successful with indoor houseplants as it creates a genetic duplicate of the parent plant from a stem, root, or node and can be carried out through water or soil propagation which we will dive into next.
There are two main methods of propagating houseplants: water propagation and soil propagation.
- Water Propagation: involves rooting the plant in water. It is a simple and effective way to propagate many indoor plants.
- Soil Propagation: involves rooting the plant in soil. It requires a bit more effort, but it is an excellent way to propagate plants that do not root well in water.
What you will need for propagating your indoor houseplants:
- Pruning shears, ensure these are clean and ideally sterilized prior to use to ensure a healthy snip.
- Small pots or containers
- Soil mix (if soil propagation)
- Water (if water propagation)
- Rooting hormone (optional), we recommend Clonex which we sell online and in our shop in downtown Napa.
- Here are Riza’s recommended plants that are easiest to propagate and will likely deliver the best results for first time propagators:
- Pothos
- Philodendron
- Monstera
- Peperomia
- Pilea
WATER PROPAGATION
We will start with water propagation, as it is a mess-free and effective way to propagate many indoor houseplants.
Step 1: Choose a healthy stem cutting that is 2-3 inches long. Make sure the cutting has a few leaves on it.
Step 2: Use your sterilized pruning shears to cut the stem at a 45-degree angle. This will increase the surface area for the plant to absorb water.
Step 3: After making the fresh cutting, spray generously with Clonex or a rooting hormone of your choosing to expedite the process as this will stimulate root growth and generation..
Step 4: Fill a small container with water and place the stem cutting in the water. Make sure the stem is fully submerged in the water. We recommend using a propagation station for optimal results and have two options that we sell online or in our downtown Napa location.
Step 5: Place the container in a bright area, but not in direct sunlight. Refresh the water every few days to prevent bacterial growth.
Step 6: After 4-6 weeks, you should see roots starting to form. Once the roots are at least an inch long, you can transplant the cutting into soil. To ensure a smooth transition from water roots to soil roots, we recommend repotting a water propagated cutting into a Jiffy pot filled with moistened soil into a small (4” recommend) dirt filled pot. The Jiffy pot is biodegradable and will allow for a smooth transition from moistened soil to regular waterings as the roots harden from water to soil.
SOIL PROPAGATION
Soil propagation requires a bit more effort than water propagation, but it is an excellent way to propagate plants that do not root well in water.
Step 1: Choose a healthy stem cutting that is 2-3 inches long. Make sure the cutting has a few leaves on it.
Step 2: Use your sterilized pruning shears to cut the stem at a 45-degree angle. This will increase the surface area for the plant to absorb water.
Step 3: After making the fresh cutting, spray generously with Clonex or a rooting hormone of your choosing to expedite the process as this will stimulate root growth and generation.
Step 4: Fill a small pot with a soil mix, we recommend using a Jiffy pot centered within a 4” nursery pot. Make a small hole in the soil with your finger or a pencil.
Step 5: Place the stem cutting in the hole and gently press the soil around it to secure it in place.
Step 6: Water the soil until it is moist, but not waterlogged. Place the pot in a bright area, but not in direct sunlight.
Step 7: After 4-6 weeks, new growth and roots should start to form. Once the roots are well-established (6-12 months), you can transplant the plant into a larger pot.
Tips for Successful Propagation
- Choose healthy plants - Make sure the plant you are propagating is healthy and disease-free. Avoid plants with yellowing leaves or signs of pests.
- Use sharp pruning shears - Use clean and sharp pruning shears to make a clean 45-degree cut on the stem.
- Avoid direct sunlight - Keep the stem cutting in a bright area, but not in direct sunlight. Direct sunlight can cause the plant to wilt or burn.
- Change water regularly - If using the water propagation method, change the water every few days to prevent bacterial growth.
- Be patient - Propagation takes time and patience. Don't get discouraged if you don't see results immediately. Keep the plant in a warm and humid environment and give it time to grow.
If you have questions about where to cut your plants for propagation, how to repot plants you’ve been propagating into soil, or any of our propagation stations or materials we are more than happy to help. You can find propagation related items in our online store or in person at our First Street location in downtown Napa at 1300 First Street, Suite 355!